AirPods Stuttering or Cutting Out on Mac? 26.5 Fix Guide
AirPods audio choppy or cutting out on your Mac? Fix Bluetooth codec drops, interference, and stuttering on macOS Tahoe 26.5 with this complete guide.
Correction, October 20, 2026: The firmware section now includes Mac-supported automatic updates. This article also qualifies interference and device-comparison claims, removes unsupported success-rate and distance assurances, and replaces blanket Bluetooth unpairing with an input-safe comparison.
If you have ever had your music crackle, your podcast skip a beat, or your AirPods turn to muffled mush the instant you joined a video call, you already know how maddening AirPods stuttering on Mac can be. The audio drops out for a half-second, comes back, then chops again — and it almost always happens at the worst possible moment. The frustrating part is that the very same AirPods sound flawless on your iPhone five minutes later, which makes it tempting to blame the Mac, the firmware, or even the hardware. The truth is more nuanced. Microphone use, wireless interference, connection settings, and automatic switching are useful things to investigate, but a symptom alone does not identify which one is responsible. This guide suggests comparisons for macOS Tahoe 26.5; it does not establish how common each cause is or promise that the steps will resolve every setup.
Key Takeaways
- Using the AirPods microphone can reduce playback quality. Check which input your app actually uses. Comparing AirPods output with a different microphone can help investigate this behavior, but it does not diagnose every call-quality problem.
- Wireless interference can affect Bluetooth playback. The checks below may help identify a contributing condition. Their success depends on the setup; there is no measured success rate for this guide.
- Re-pairing is a troubleshooting step, not proof of a corrupted pairing. If needed, re-pair the affected AirPods only. Keep working keyboards and mice paired.
- Automatic Switching can yank your AirPods to your iPhone or iPad mid-task. Disabling it keeps a stable connection to your Mac.
- Firmware, contact cleanliness, and battery imbalance between the two buds are easy-to-miss hardware-side factors that produce one-sided or random dropouts.
Why AirPods Stutter on a Mac: The Short Version
Bluetooth audio is a balancing act between bandwidth, latency, and battery. AirPods and most modern wireless headphones support a high-quality playback codec — AAC in Apple's ecosystem, or aptX/aptX HD/LDAC on some third-party headphones — that delivers full-range stereo sound. But Bluetooth's classic audio stack has a long-standing limitation: high-quality playback and microphone capture cannot happen at the same time over the same connection. The moment software needs both your ears and your mouth, the connection collapses into a single low-bandwidth, two-way profile historically known as HFP/HSP (Hands-Free Profile / Headset Profile), which uses the SCO link layer.
That is why the same pair of AirPods can sound pristine while you stream Apple Music, then sound like a 1990s cell phone the instant you join Zoom. Nothing broke. The codec simply downshifted. Understanding which of your symptoms is codec-related and which is radio-interference-related is the key to fixing the right thing, so we will treat them as two separate problems.
Use these observations to choose a comparison, rather than to diagnose the cause:
- Audio quality drops when the AirPods microphone is in use → compare playback after closing apps that use that microphone. Apple explains this Bluetooth audio behavior.
- Audio stutters during plain playback → compare the same downloaded audio nearby before investigating the environment or connection. This symptom alone does not establish interference.
- One bud cuts out, playback differs between devices, or audio moves to another device → record these separately. Different devices behaving differently does not by itself prove a hardware or firmware fault.
The sections below offer starting points for these observations, not mutually exclusive diagnoses.
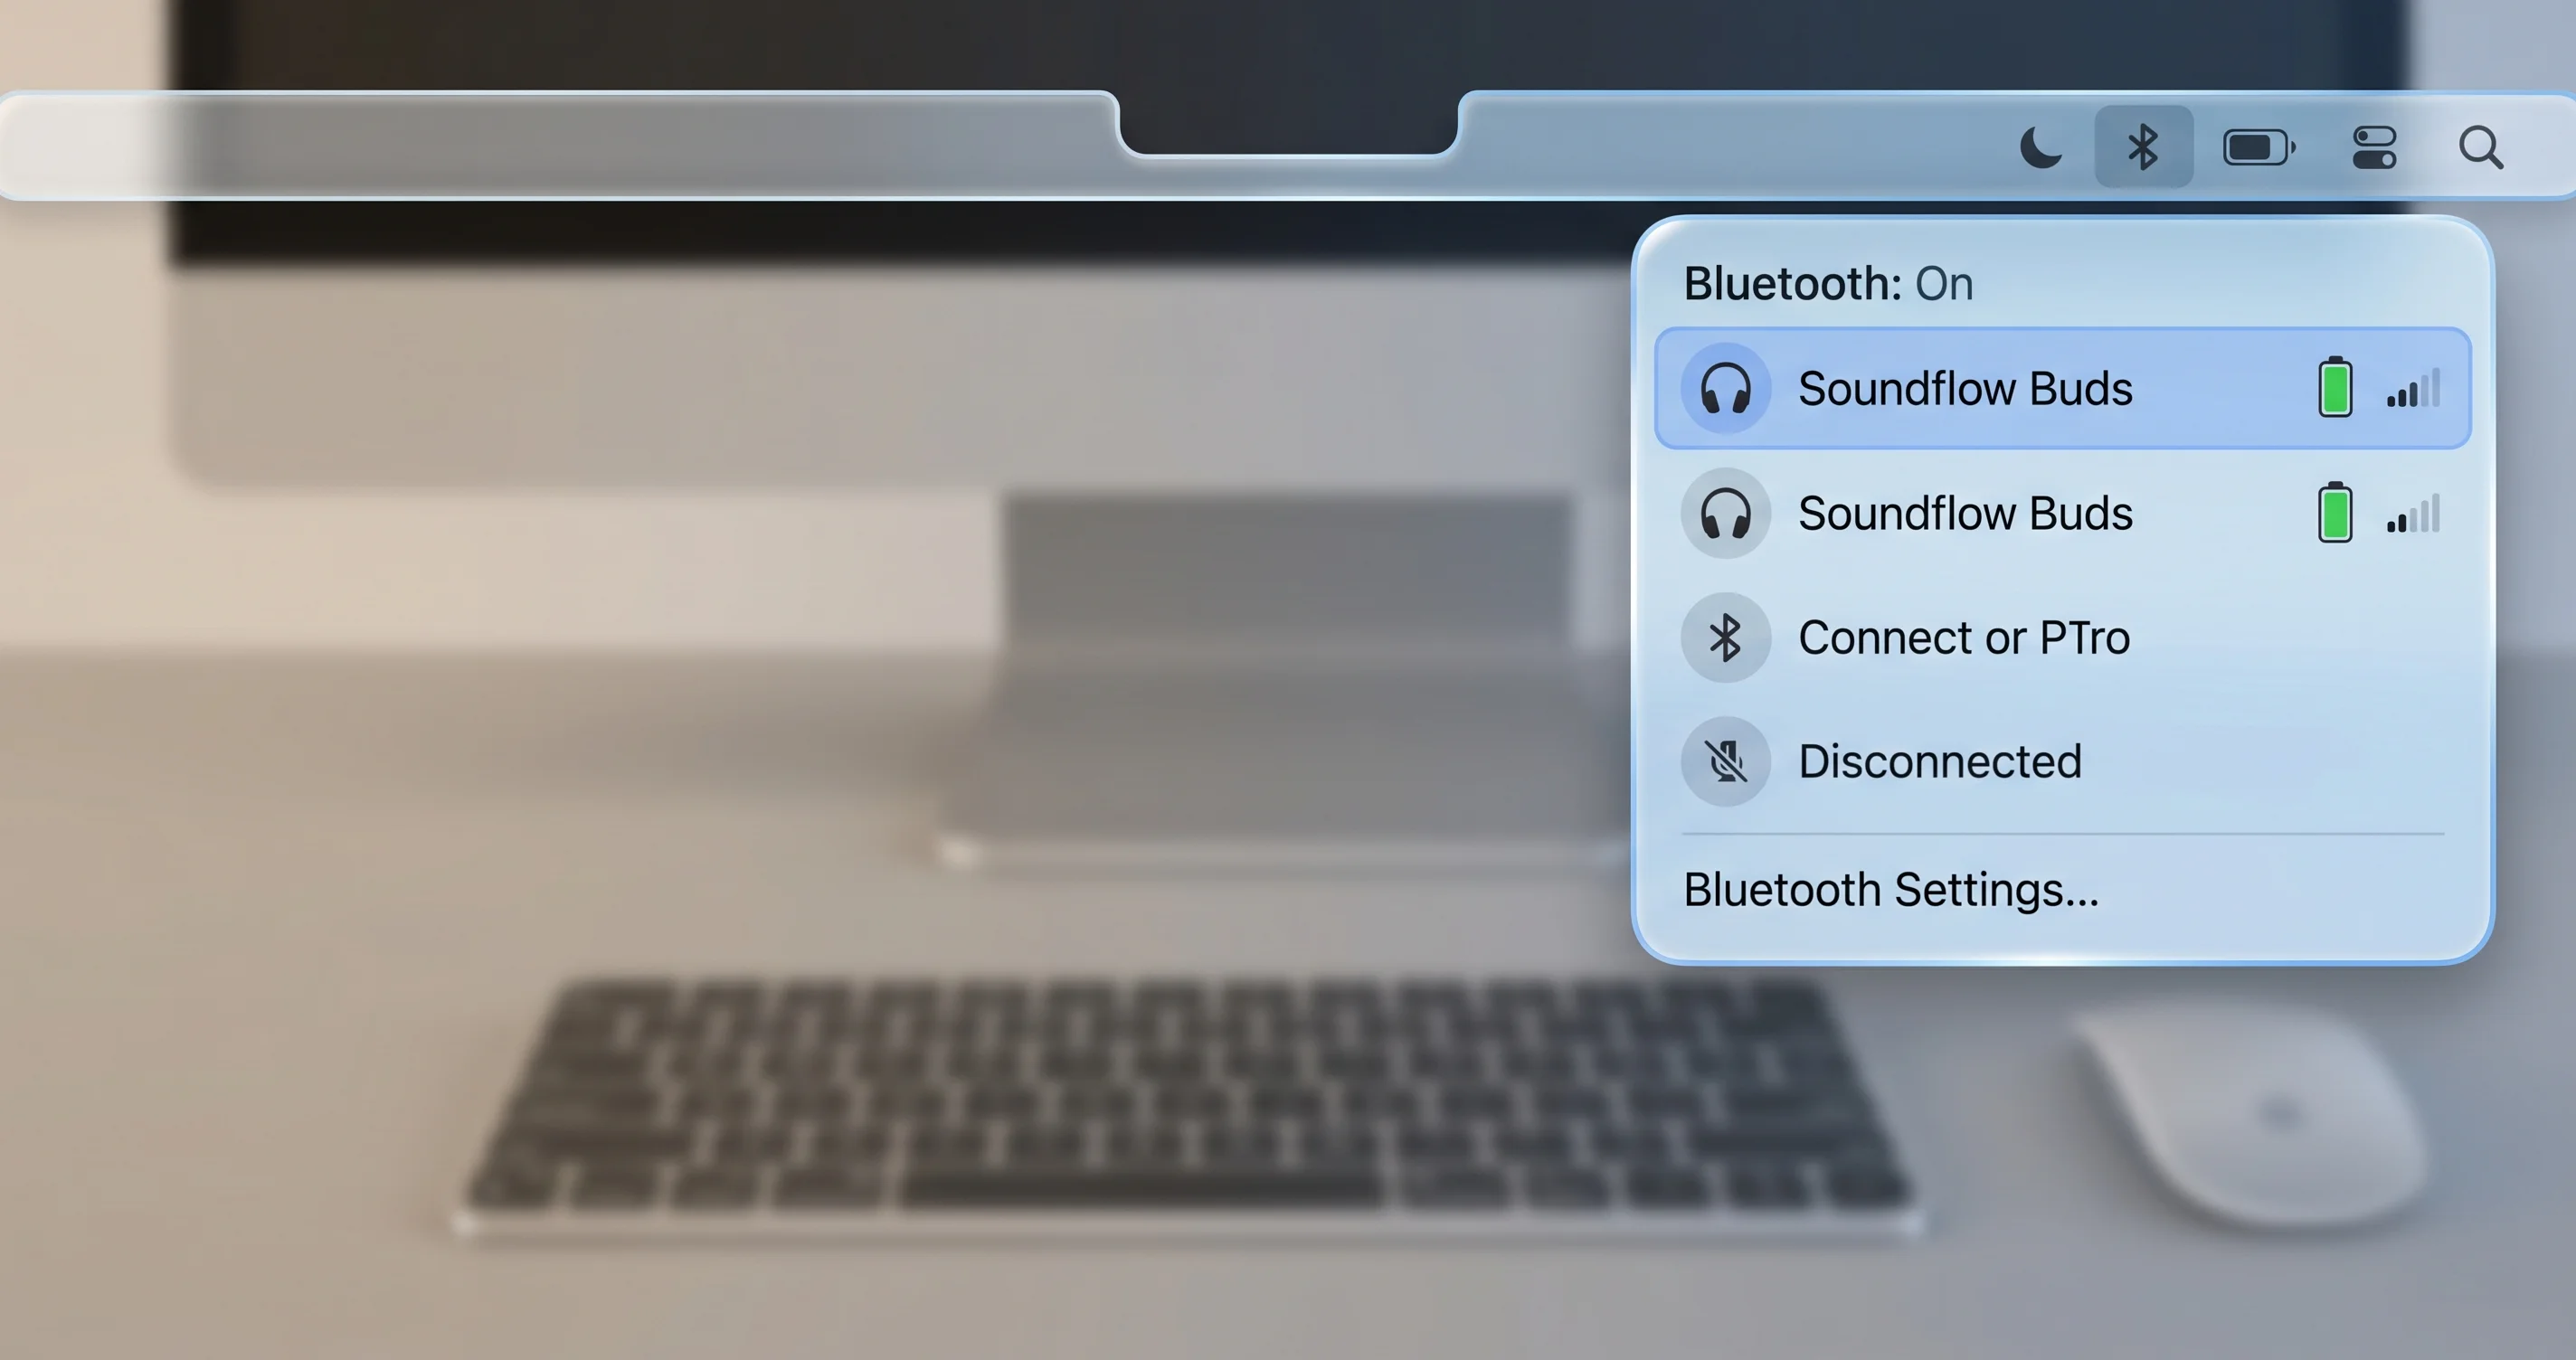
Fix the Codec Drop: Keep AirPods in High-Quality Mode During Calls
This is the most impactful fix in the entire guide, and it is the one that generic "restart Bluetooth" articles never mention. If your AirPods sound muffled, hollow, or distinctly low-fidelity during FaceTime, Zoom, Teams, Google Meet, Discord, or any other communication app, the codec switch is the cause.
Why It Happens
When an application requests microphone access, macOS has to provide a two-way audio path to your AirPods. Classic Bluetooth audio cannot run the high-quality one-way playback profile (A2DP, carrying AAC) and a microphone path simultaneously. So the system tears down the A2DP/AAC link and brings up the bidirectional HFP/SCO link instead. That link is optimized for intelligibility on phone calls, not fidelity — it is narrowband or, at best, wideband mono-quality audio. The result: everything you hear, not just the call, drops to telephone quality, and the reduced headroom makes stutters and dropouts more likely too.
This is a limitation of the Bluetooth Classic audio architecture, not a bug Apple introduced in Tahoe 26.5. The newer Bluetooth LE Audio standard and its LC3 codec are designed to fix exactly this by carrying high-quality bidirectional audio, but adoption across apps, accessories, and the OS is still partial, so the classic behavior remains the everyday reality for most AirPods-on-Mac users in 2026.
It helps to picture the two profiles side by side. A2DP (Advanced Audio Distribution Profile) is the one-way, high-bandwidth pipe that streams AAC to your AirPods when you play music or video. It carries a rich stereo signal because all of the available bandwidth is dedicated to one direction. HFP/HSP over SCO is the two-way pipe: it has to carry your voice up to the Mac and the call audio down to your ears at the same time, so each direction gets a thin slice of bandwidth optimized for speech intelligibility, not music. When the system tears down A2DP and brings up SCO, you are not just losing call quality — you are losing the high-quality pipe for all audio routed to those AirPods until the mic is released. That is why a YouTube video playing in another tab also sounds compressed the moment a call app grabs the microphone.
Crucially, the trigger is any application requesting the microphone, not just calls. Dictation, Voice Memos, a screen recording set to capture the mic, a browser tab that has been granted mic permission, or a forgotten background app holding an open input stream will all force the downshift. This is why some users see the quality drop "randomly" — an app they forgot about is holding the mic open. Quitting suspect apps, or checking which apps have recently used the microphone in System Settings → Privacy & Security → Microphone, often reveals the offender.
The Reliable Workaround: Split Input and Output
The trick is to never let the AirPods be the microphone. If you keep AirPods as the output device only and route the input to a different microphone, macOS never needs the bidirectional link, so your AirPods stay in high-quality playback mode the entire call. People on the other end hear you through whatever mic you chose; you hear them in full fidelity.
The best alternate microphone, in order of preference:
- A dedicated USB or XLR-interface microphone — best quality for you and others.
- A wired headset mic or lavalier plugged into the Mac.
- The Mac's built-in microphone — surprisingly good on modern MacBooks and the simplest option.
How to Split Devices System-Wide
- Open System Settings → Sound.
- On the Output tab, select your AirPods.
- On the Input tab, select MacBook microphone (or your USB/wired mic) — not the AirPods.
With Input set to something other than the AirPods, most apps will respect that split and leave your AirPods in playback mode.
How to Split Devices Per App
System-wide settings are a good default, but communication apps often have their own audio device pickers that override the system. Set them explicitly:
- Zoom: Settings → Audio → set Speaker to AirPods and Microphone to your Mac's built-in or USB mic. Turn off "Automatically adjust microphone volume" if your level swings.
- Microsoft Teams: Settings → Devices → set Speaker to AirPods and Microphone to the Mac/USB mic.
- FaceTime: FaceTime does not expose a granular per-app device picker the way Zoom does, so it tends to follow the system Input/Output split. Setting the system Input to the built-in mic before the call is the most dependable approach.
- Google Meet (in browser): click the three-dot menu → Settings → Audio, and choose the speaker and microphone independently there.
- Discord: User Settings → Voice & Video → set Output to AirPods, Input to the Mac mic.
After you set these, start a test call. If your AirPods stay in full-quality mode (music-grade sound) while you talk, the split worked. If audio still downshifts, double-check that no app is grabbing the AirPods as input — even a background app holding the mic can trigger the switch.
A Note on Latency vs. Quality
Some headphones expose codec choices (for example, switching aptX HD to standard aptX or SBC) that trade quality for lower latency. AirPods do not give you a manual codec selector on the Mac. If you mainly care about lip-sync while watching video and not about call fidelity, the interference fixes below will help more than codec tweaks, because AirPods automatically reduce latency for video playback when the system detects it.
Fix Interference: Clear the 2.4 GHz Traffic Jam
If audio stutters during plain music or video playback, interference is one possibility to investigate. A streaming or app-related problem can produce a similar interruption, so compare downloaded audio before drawing a conclusion. Apple's wireless-headphone troubleshooting starts with a nearby, locally stored audio test.
What Competes With Bluetooth
- 2.4 GHz Wi-Fi — one potential contributor. It shares this frequency band with Bluetooth; that overlap alone does not establish the cause of a particular dropout.
- USB-3 devices and hubs — this surprises people. USB-3 ports, cables, hubs, and external SSDs emit broadband RF noise that bleeds directly into the 2.4 GHz band. Apple has published guidance acknowledging that USB-3 devices can interfere with wireless devices operating at 2.4 GHz, including Bluetooth.
- Microwave ovens, cordless phones, and some baby monitors — intermittent but powerful sources.
- Physical obstructions — walls, metal furniture, and even your own body between the Mac and the AirPods.
Steps to Reduce Interference
- Reduce distance and obstructions. Keep the Mac within a few meters of the AirPods, with clear line of sight. Stuttering that gets worse when you turn your head or put your phone between you and the Mac is a classic distance/obstruction signature.
- Compare an available 5 GHz Wi-Fi connection. This may reduce competition in the 2.4 GHz band, but does not remove every possible source of interference. Record the network used and whether the same playback changes before altering router settings.
- Relocate USB-3 hubs and SSDs. Move them farther from wireless devices and avoid placing them on the Mac. Apple's interference guidance gives no fixed distance that guarantees improvement. Re-test rather than treating a particular number of centimeters as a fix.
- Watch the desk layout. A common bad setup: a USB-3 SSD or hub sitting directly beside the laptop hinge, right under where the antennas live. Re-position it.
- Test in another room away from nearby electronics, using the same downloaded audio. Improvement is a clue that the setup matters; it does not identify a particular interference source or prove that the issue is permanently fixed.
- Check your dock and display setup. Many docking stations route USB-3, DisplayPort, and Ethernet through a single hub that sits inches from your laptop. If your AirPods only stutter when the Mac is docked, the dock is your prime suspect. Try a different port, a different cable, or moving the dock further from the lid.
- Compare the Mac's Wi-Fi conditions carefully. A change after moving from 2.4 GHz to 5 GHz can support further investigation of the wireless environment. It does not prove that the Wi-Fi card was at fault or that all interference has been eliminated.
How to Tell Interference From a Pairing Problem
Interference and connection problems can produce similar symptoms. Change one condition at a time and repeat the same playback, noting the room, distance, connected accessories, and whether the file is local or streamed. Improvement after a change is useful evidence, but it is not a definitive test of the pairing record or of a specific radio source. No improvement in another room does not rule out interference. If interruptions continue after the nearby downloaded-audio comparison, Apple's linked headphone guide suggests unpairing and pairing the affected headphones again; keep unrelated input devices paired.
If you suspect your Wi-Fi itself is unstable on top of the interference, our macOS Tahoe Wi-Fi dropping fix guide walks through band steering and channel selection in more depth, which also benefits Bluetooth indirectly by getting Wi-Fi off the 2.4 GHz band.
Connection Management: Re-Pair, Prune, and Reset
If interference is under control and you are not in a call but audio still cuts out, the pairing itself may be stale or your Mac may be juggling too many Bluetooth radios at once.
Forget the Device and Re-Pair
If playback still cuts out after the earlier comparisons, unpairing and pairing the affected AirPods again is a troubleshooting option. Improvement afterward does not prove that the old pairing record was corrupted. Make sure you can complete the model-specific pairing steps before removing the AirPods.
- Open System Settings → Bluetooth.
- Find your AirPods, click the info (i) button, and choose Forget This Device. Confirm.
- Put the AirPods in their case, open the lid, and hold the setup button on the back until the status light blinks white.
- Hold the AirPods near the Mac and select them when they appear in the Bluetooth list to re-pair.
Temporarily Disconnect Nonessential Accessories
For a reversible comparison, disconnect only accessories that you do not need for this test. A list of saved pairings is not the same as a list of active connections. Before changing anything, confirm that the Mac's built-in keyboard and trackpad, or a suitable wired alternative, actually work. Do not disconnect your only working keyboard or pointer. Keep a note of the original connections so you can restore them after the test.
- In System Settings → Bluetooth, use Disconnect for a nonessential connected accessory, or switch that accessory off. Do not use Forget This Device for this comparison. Apple distinguishes disconnecting from forgetting an accessory.
- Re-test the same audio, then reconnect the accessory. Repeat one change at a time. A difference helps narrow the conditions worth investigating; it does not establish that the accessory is defective.
Try a Restart Without Removing Every Pairing
Do not use sudo pkill bluetoothd or a blanket removal of Bluetooth pairings as a required step in this guide. Restarting, disconnecting an accessory, and forgetting a pairing are different operations; none should be described here as a guaranteed module reset. Keep a working input method available throughout the following checks:
- Before toggling Bluetooth, verify working built-in or wired input. If that is unavailable, skip the toggle. Apple's Bluetooth guidance notes that a desktop Mac using only Bluetooth input devices cannot turn Bluetooth off. If you can safely toggle it, reconnect and compare the same playback afterward.
- Restart the Mac. Save your work first, then repeat the same playback after signing in. Record whether the symptom returns; a restart is a troubleshooting comparison, not proof of a particular Bluetooth fault.
- Keep unrelated Bluetooth devices paired. If re-pairing is still needed, limit it to the affected AirPods and follow the instructions for that model. Removing every keyboard, mouse, or other accessory is unnecessary for this comparison and can leave you without a usable input device.
- If problems persist across restarts, boot into Safe Mode (on Apple Silicon: shut down, hold the power button until startup options appear, choose your disk while holding Shift) and test there. Stable Bluetooth in Safe Mode points to a login item or third-party audio extension as the culprit.
For a broader walkthrough of every Bluetooth failure mode — pairing failures, devices not working at login, and more — see our complete macOS Tahoe Bluetooth troubleshooting guide.
Stop Unexpected Handoffs: Automatic Switching and Ear Detection
Sometimes the audio does not stutter so much as vanish — your AirPods go silent because they quietly connected to your iPhone or iPad instead of the Mac. Two features cause this.
Disable Automatic Switching
Apple's Automatic Switching is designed to move your AirPods to whichever device you are actively using. The intent is convenience; the reality, when it misfires, is that your AirPods jump to your phone the instant a notification plays, dropping your Mac audio. To pin them to the Mac:
- Wear your AirPods and connect them to the Mac.
- Open System Settings → Bluetooth, click the info (i) button next to your AirPods.
- Find Connect to This Mac and set it to When Last Connected to This Mac instead of Automatically.
This tells the Mac to take the AirPods when they were last on the Mac, rather than constantly contending with your other Apple devices. You can do the same in reverse on your iPhone/iPad if it keeps stealing them.
Tune Automatic Ear Detection
Automatic Ear Detection pauses audio when you remove a bud and resumes when you reinsert it. If a bud is loose, or the proximity sensor is dirty, the system may think you are constantly removing and reinserting it, causing audio to stutter, pause, or cut out. If you get phantom pauses:
- In System Settings → Bluetooth, open the info panel for your AirPods.
- Toggle Automatic Ear Detection off as a test.
- Re-test. If the stutter stops, the sensor or fit was the issue — clean the sensors (see below) and you can usually turn the feature back on.
If you rely on Handoff and Continuity across your devices and want this behavior to work with you rather than against you, our Continuity features troubleshooting guide covers how the whole ecosystem coordinates device handoff.
Why the Tug-of-War Happens at All
Automatic Switching relies on iCloud and a constant background negotiation between your Apple devices about who "deserves" the AirPods based on recent activity, audio playback, and active calls. The logic is good when only one device is genuinely active, but it gets confused in common real-world situations: a Slack notification pings on your iPhone while you are working on the Mac, the phone briefly plays a sound, and the AirPods follow it — cutting your Mac audio mid-sentence. Pinning the connection with "When Last Connected to This Mac" short-circuits that negotiation in favor of the device you choose. If you regularly move between a Mac and an iPad for media, the cleaner habit is to manually select the AirPods from each device's audio menu when you switch, rather than relying on the automatic guess. Manual selection is instant and never wrong.
macOS 26.5 Audio Routing: Control the Default Output
A frequent Tahoe 26.5 complaint is "my Mac keeps switching audio output to AirPods" the moment they connect — even when you wanted sound to come from the speakers, or vice versa. Routing fights can manifest as a brief stutter or a full output swap mid-playback.
Set and Lock Your Default Output
- Open System Settings → Sound → Output and explicitly select the device you want.
- Use the Sound control in Control Center (or the menu bar Sound icon, if you enable it via System Settings → Control Center → Sound → "Always Show in Menu Bar") to switch outputs quickly without diving into settings.
- When AirPods connect, macOS will often grab focus as the output. If you do not want that, simply reselect your speakers from the menu bar Sound control; the choice sticks until the next connect event.
Per-App Output Control
macOS does not offer a built-in per-app output mixer the way some operating systems do, but most media apps respect the system output, and communication apps expose their own picker (covered earlier). If you need true per-app routing — for example, music to speakers while a call goes to AirPods — a reputable third-party audio router utility is the only reliable way to achieve it. For a fuller tour of system audio behavior, output devices, and sample-rate settings, see our macOS Tahoe audio complete guide.
Hardware and Firmware: The Often-Missed Causes
When software fixes do not fully resolve stuttering — especially one-sided dropouts — look at the AirPods hardware and firmware.
Update AirPods Firmware
Apple's firmware instructions include Mac, not just iPhone and iPad. Updates are automatic; there is no immediate-update button.
For AirPods or AirPods Pro, connect them to an updated Mac with Bluetooth enabled and Wi-Fi connected. Put the earbuds in their powered charging case, close the lid, and keep them within Bluetooth range for at least 30 minutes. Reconnect and check the version in System Settings → Bluetooth → the AirPods info button. AirPods Max uses a different charging procedure; follow Apple's model-specific instructions.
Clean the Contacts and Sensors
Wax, dust, and grime on the charging contacts or the proximity sensors cause uneven charging and false ear-detection events — both of which produce stutter and one-sided cut-outs. Gently clean the metal contacts inside the case and on the AirPods stems with a dry, lint-free cloth or a dry soft-bristled brush. Do not use liquids inside the case.
Battery Imbalance Between Buds
If one AirPod consistently dies before the other, or one bud cuts out while the other plays fine, the buds may have drifted out of battery balance, or one bud's battery may be degrading. Fully charge both in the case until they show 100% on a paired device. If one bud refuses to hold a charge or keeps dropping while the other is healthy, that bud's battery may be failing — a hardware service situation rather than a software fix. Battery health across your Apple gear matters more than people expect; our Mac battery charge limit guide covers the broader picture of keeping Apple batteries healthy.
Reset the AirPods Hardware Itself
A pairing reset on the Mac side clears the Mac's record, but the AirPods also keep their own internal state. A full AirPods hardware reset resolves stubborn dropouts that survive re-pairing:
- Put both AirPods in the case and close the lid for about 30 seconds, then open it.
- On the paired iPhone, forget the AirPods under Settings → Bluetooth (this also clears them from iCloud-linked devices).
- With the lid open, press and hold the setup button on the back of the case for about 15 seconds, until the status light flashes amber and then white.
- Re-pair to your Mac (and other devices) from scratch.
This clears any corrupted state stored on the AirPods themselves — including stale codec or connection preferences — and is worth doing once before concluding that you have a hardware fault.
Rule Out a Specific Mac vs. the AirPods
Trying the AirPods with an iPhone or another Mac can help narrow the conditions in which the symptom occurs. It is an additional comparison, not an Apple diagnostic that distinguishes a faulty Mac from faulty AirPods. Start with the same downloaded audio where possible, keep the distance and surroundings similar, and note the selected microphone, app, software versions, and connected accessories. If the problem occurs on several devices, record that pattern for support; shared surroundings, content, or settings can still matter. If it occurs on only one Mac, investigate that setup without declaring the Mac defective or clearing the AirPods of every possible issue. Repeat the comparison under the conditions that normally trigger the interruption. A brief successful playback cannot establish a lasting fix, especially if the original problem was intermittent. Keep the failed and successful observations together so that support can see what changed and what stayed the same.
Troubleshooting Common Issues
Below are the specific symptom patterns readers ask about most, each paired with the most likely fix.
Problem: One AirPod cuts out while the other plays fine
Solution: This is usually hardware-side, not interference. First clean the charging contacts and ear sensors on the affected bud. Then reset the AirPods (Forget This Device, then hold the case button until the light blinks white, then re-pair). If one bud still drops, check for battery imbalance by fully charging both. A persistently failing single bud points to a degraded battery and likely needs service.
Problem: Audio is fine for music but turns muffled during video calls
Solution: This is the codec drop, full stop. Set your call app's microphone to the Mac's built-in mic (or a USB mic) and keep AirPods as output only, as detailed in the codec section. The muffled sound is the HFP/SCO telephony profile; splitting input and output keeps AAC playback alive.
Problem: Noticeable lag or audio-video sync issues when watching video
Solution: Some Bluetooth latency is inherent, but AirPods reduce latency automatically for video. If lag is severe, it usually rides on interference: move USB-3 devices away, shift Wi-Fi to 5 GHz, and reduce distance. Restarting playback after AirPods fully connect also lets macOS apply its low-latency video timing. Quitting and reopening the video app can re-establish the correct sync.
Problem: AirPods connect but produce no sound at all
Solution: macOS connected the AirPods for control but did not route audio to them. Open System Settings → Sound → Output and manually select the AirPods. If they are selected but silent, toggle Bluetooth off/on, then disconnect and reconnect the AirPods. If still silent, Forget This Device and re-pair. A restart clears the audio routing state on Apple Silicon.
Problem: Music stutters constantly even close to the Mac
Solution: Suspect interference from a USB-3 device right next to the laptop — a dock, hub, or external SSD. Move it away and re-test. Also switch your Wi-Fi to 5 GHz to vacate the 2.4 GHz band. If stuttering persists with all peripherals unplugged and Wi-Fi off, re-pair the AirPods to rule out a corrupted pairing.
Problem: AirPods keep disconnecting to my iPhone mid-task
Solution: Automatic Switching is moving them. In System Settings → Bluetooth, open the AirPods info panel and change "Connect to This Mac" to "When Last Connected to This Mac." Do the equivalent on the iPhone if it keeps grabbing them. This pins the connection and stops the tug-of-war between your devices.
Problem: Audio pauses randomly even when both buds are in my ears
Solution: Automatic Ear Detection is misfiring, usually from a dirty proximity sensor or loose fit. Clean the sensors, ensure a snug fit, and as a diagnostic, toggle Automatic Ear Detection off. If the random pauses stop, the sensor was the cause; clean thoroughly and you can re-enable the feature.
Problem: Mic also fails — others can't hear me on calls
Solution: If your microphone issues go beyond the codec downshift (others hear nothing at all), it may be an input-permissions or device-selection problem rather than a Bluetooth codec issue. Our Mac microphone not working fix guide covers privacy permissions and input routing in detail.
FAQ
Why do my AirPods sound bad only during Zoom or FaceTime calls?
Because the app activates the microphone, which forces macOS off the high-quality AAC playback codec onto the low-bandwidth HFP/SCO telephony profile that supports two-way audio. Everything you hear drops to phone-call quality. Setting the call app's microphone to your Mac's built-in mic, while keeping AirPods as output only, keeps AAC playback active.
Does using my Mac's built-in mic instead of AirPods really fix the quality drop?
Yes. The fidelity loss happens specifically because the AirPods have to act as both speaker and microphone over one Bluetooth link. If the microphone is the Mac's built-in mic (or any non-AirPods mic), the AirPods only handle playback, so they stay in high-quality AAC mode for the entire call. Callers still hear you through the chosen mic.
Can USB-3 hubs and SSDs actually cause Bluetooth stuttering?
They can contribute to wireless interference, but proximity alone does not diagnose your dropout. Try changing the placement of one device and compare the same playback. A changed result is a clue; an unchanged result does not prove that the accessory is faulty or that interference is absent. See Apple's interference guidance linked above.
How do I update my AirPods firmware on a Mac?
Yes, a compatible Mac can provide the conditions for an automatic update. Follow the firmware section above; do not confuse automatic updating with an immediate-update button.
Why do my AirPods keep switching to my iPhone?
Apple's Automatic Switching moves AirPods to whichever device it thinks you are using, and it sometimes guesses wrong. In System Settings → Bluetooth, open the AirPods info panel and change "Connect to This Mac" to "When Last Connected to This Mac." This stops the Mac and iPhone from fighting over the connection and keeps audio stable.
Is the sudo pkill bluetoothd Bluetooth reset still safe on macOS Tahoe 26.5?
This guide does not require that command. Use the input-safe checks above instead, and keep unrelated devices paired. A restart is not evidence of a complete Bluetooth module reset. Before any Bluetooth toggle, confirm that built-in or wired input works; if it does not, skip the toggle. If re-pairing remains necessary, limit it to the affected AirPods.
Will Bluetooth LE Audio fix the codec drop for good?
Potentially. Bluetooth LE Audio and its LC3 codec are designed to carry high-quality bidirectional audio, which would eliminate the playback-vs-microphone tradeoff. But adoption across apps, accessories, and the OS is still partial in 2026, so the classic AAC-to-telephony downshift remains the everyday behavior for most AirPods-on-Mac setups for now.
Why does only one of my AirPods cut out?
One-sided dropouts are usually hardware-related rather than interference. Clean that bud's charging contacts and sensors, re-pair the AirPods, and fully charge both to rule out battery imbalance. If one bud keeps dropping while the other is fine after all that, its battery is likely degrading and the unit may need service.
Conclusion
Start with the symptom you can actually observe: reduced quality during microphone use, interrupted playback, or audio moving between devices. Use the relevant comparison, change one condition at a time, and keep a record of the result. These checks can help narrow the investigation, but they do not establish a root cause from a single test or provide a measured majority-success rate. If the issue persists, share the repeatable pattern with Apple Support or the accessory maker. Include the Mac and AirPods models, software versions, audio source, app, and what you already tried, without treating a suspected cause as a confirmed diagnosis. A useful stopping point is a reliable temporary listening setup and a clear report; repeated resets are not required just because the cause remains uncertain.
For related reading, continue with our macOS Tahoe audio complete guide and our Continuity Camera not working fix guide to round out your wireless and audio setup on macOS Tahoe 26.5.